
Why
It provides flexibility by allowing integration with various tools and platforms, making it suitable for diverse development environments.
Additionally, Azure DevOps supports continuous integration and delivery (CI/CD) pipelines, which automate the build, test, and deployment processes, significantly reducing the time-to-market for software applications.
This automation enhances efficiency and reduces operational risks, making it an attractive choice for businesses seeking to streamline their development processes.
Another key advantage of Azure DevOps is its ability to foster collaboration and improve code quality.
It offers centralized platforms for code management, project tracking, and team collaboration, ensuring that all stakeholders have visibility into project progress.
Furthermore, Azure DevOps provides high availability with a 99.9% uptime SLA and robust security features, making it a reliable choice for businesses.
Prerequisites
Create an account on Microsoft. You can use any existing email address and it doesn’t have to be a Microsoft one.
Then browse to:
1https://portal.azure.comopt-in for the free tier
browse the homepage to create your organization that will enable you to start with DevOps:
1https://aex.dev.azure.com/me
Creation of the DevOps
Once you’re on the aex.dev.azure.com page, click Create an organization.
Choose a name and choose the region where to host the code you’ll create.
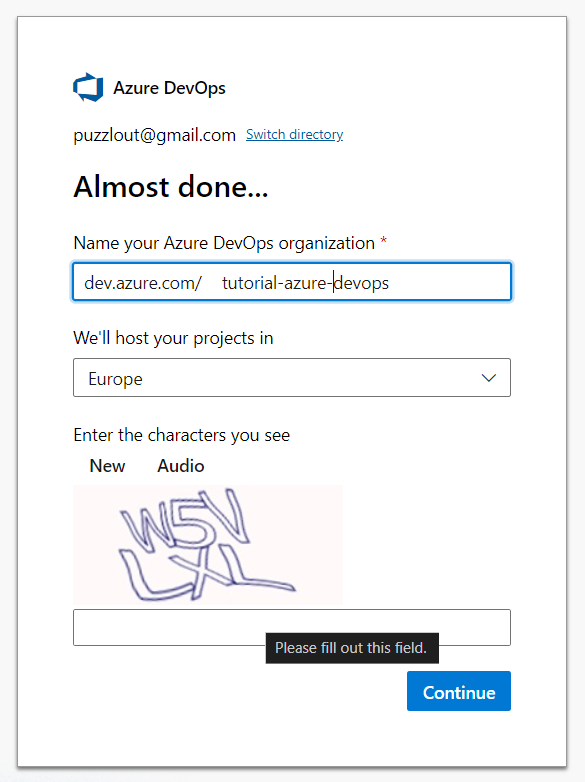
I recommend picking a name without space.
Once the organization is created, DevOps will prompt you to create the first project where you will organize your work, store your code and generate your builds of the applications you’ll craft.
Provide the project name and click Create project:
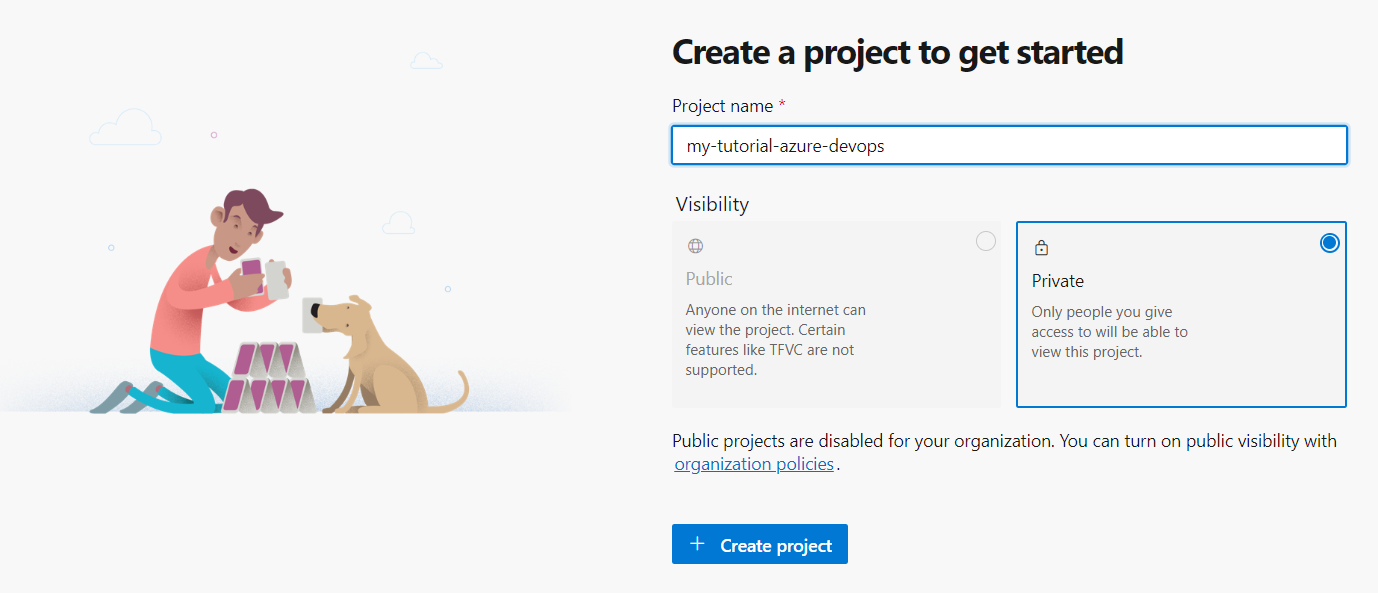
Here again, I recommend picking a name without space.
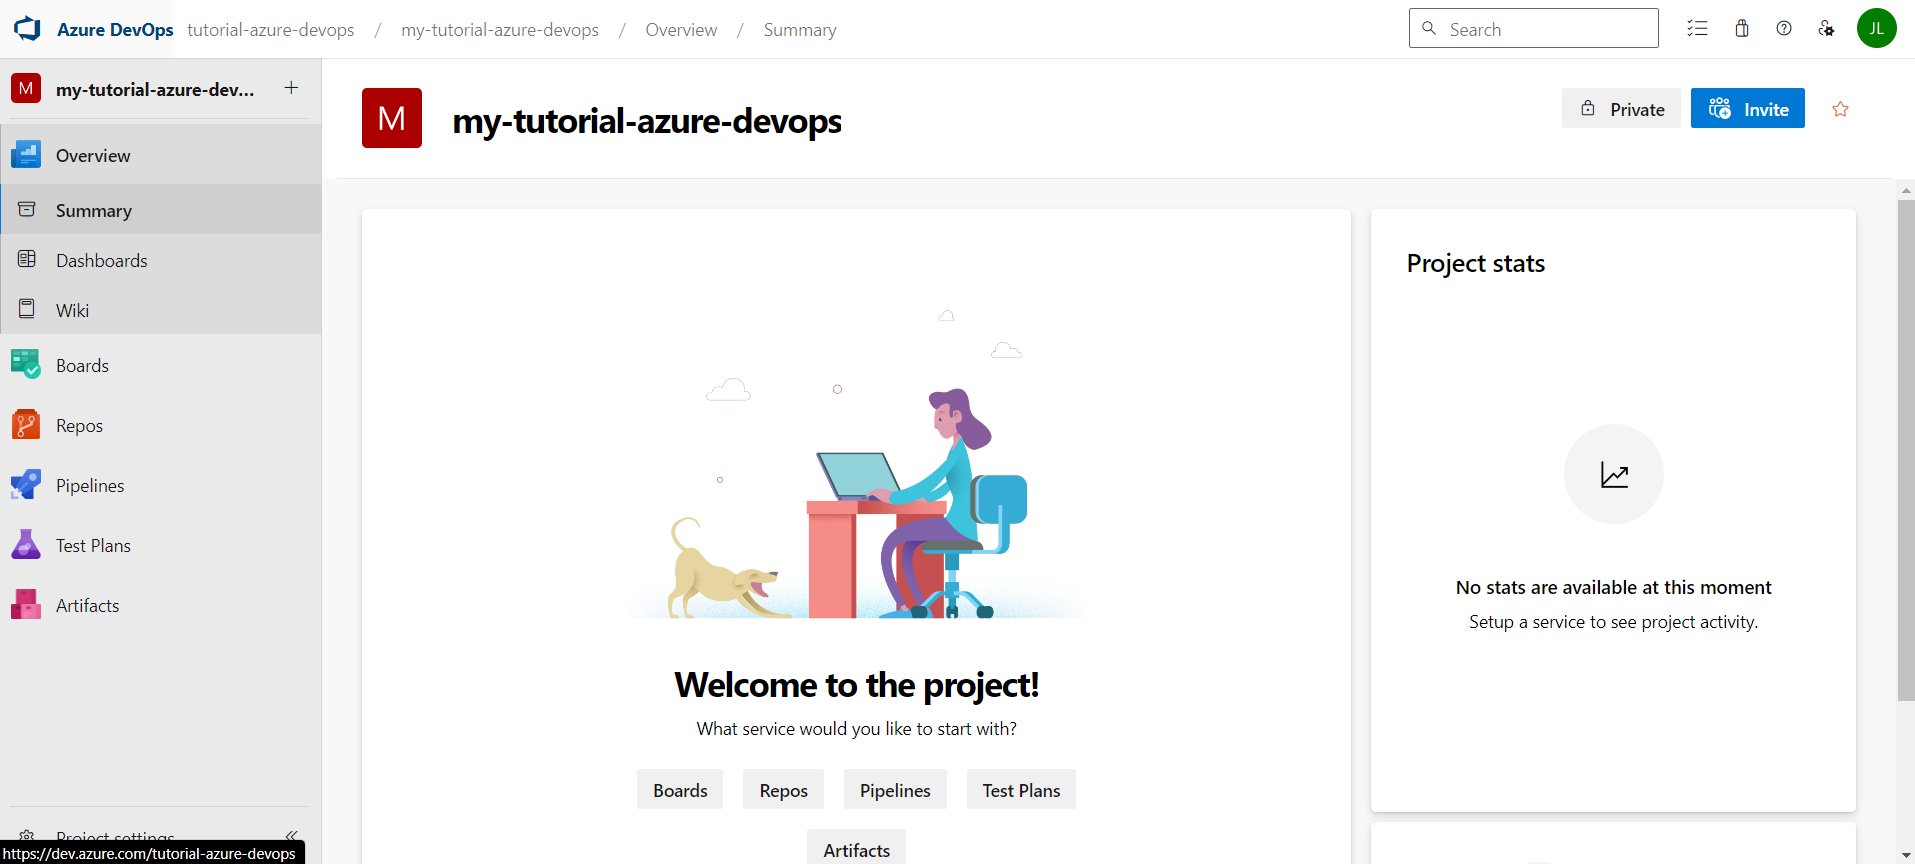
There you are: your free DevOps workspace is ready to use!
Description Of The DevOps Tools
From the Overview blade
You can configure some widgets from the screens Summary or Dashboards to quickly view your team’s progress.
Also, you access the wiki, a Markdown-friendly area where you can share processes, how-to and other quick documentation.
I don’t find flexibly enough, but having used various versions of Azure DevOps, I see that it has improved over time.
For me, the search and the link sharing isn’t friendly enough compared to a Hugo website.
Back to using spaces...
If you’ve created an organization and a first project with spaces, sharing wiki links won’t be very user-friendly since spaces will be encoded in all URLs.
From the Board blade
You can create your stories, tasks and so on to organize your work. As part of the free tier, you’ve got these included:
- Up to 5 users
- Unlimited private Git repositories
- 1 Microsoft-hosted CI/CD parallel job (up to 1800 minutes per month)
- Basic Azure Boards features
You can configure your workflow and define how the work items should be organized according to your need (with or without agility).
From the Repos blade
You can start storing your code or create a custom repository with another name than the first project’s name.
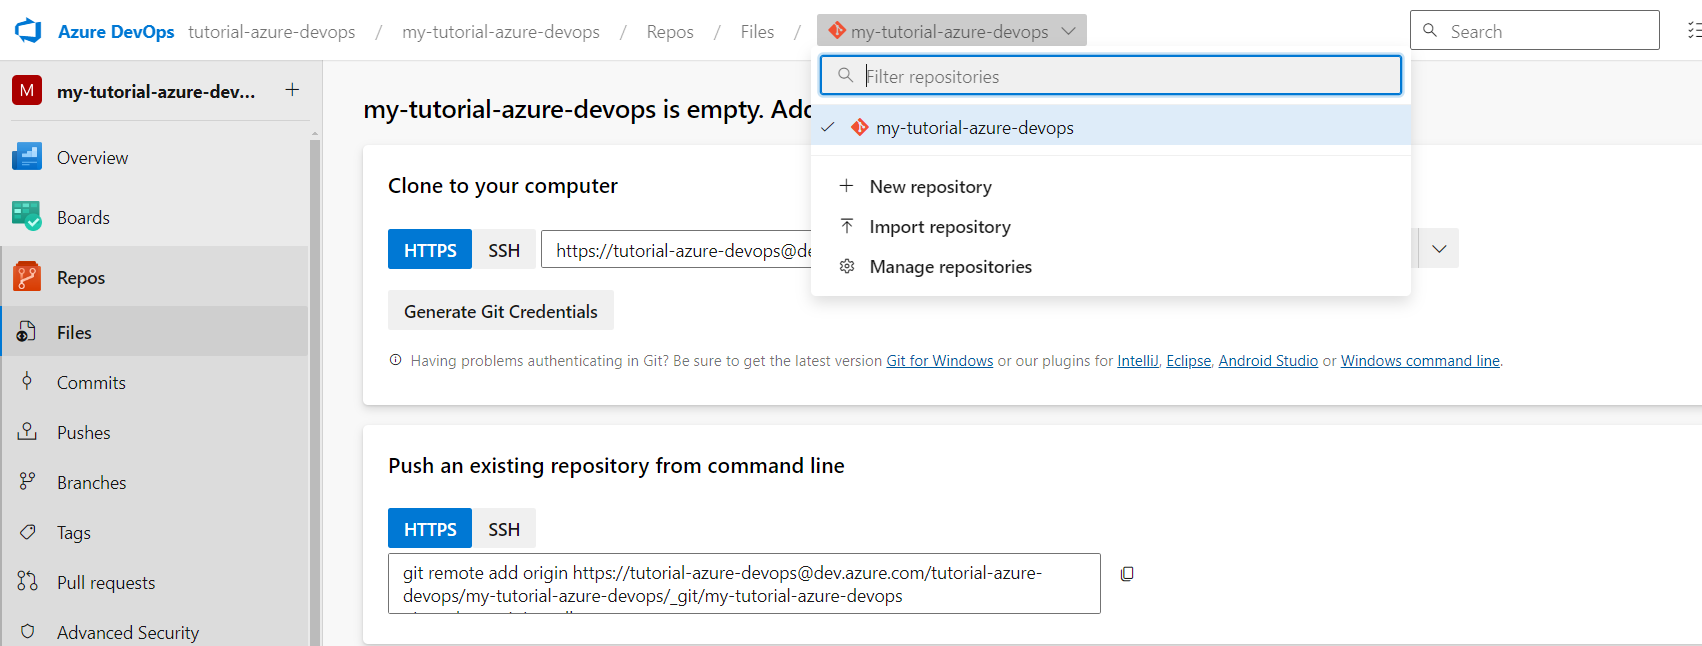
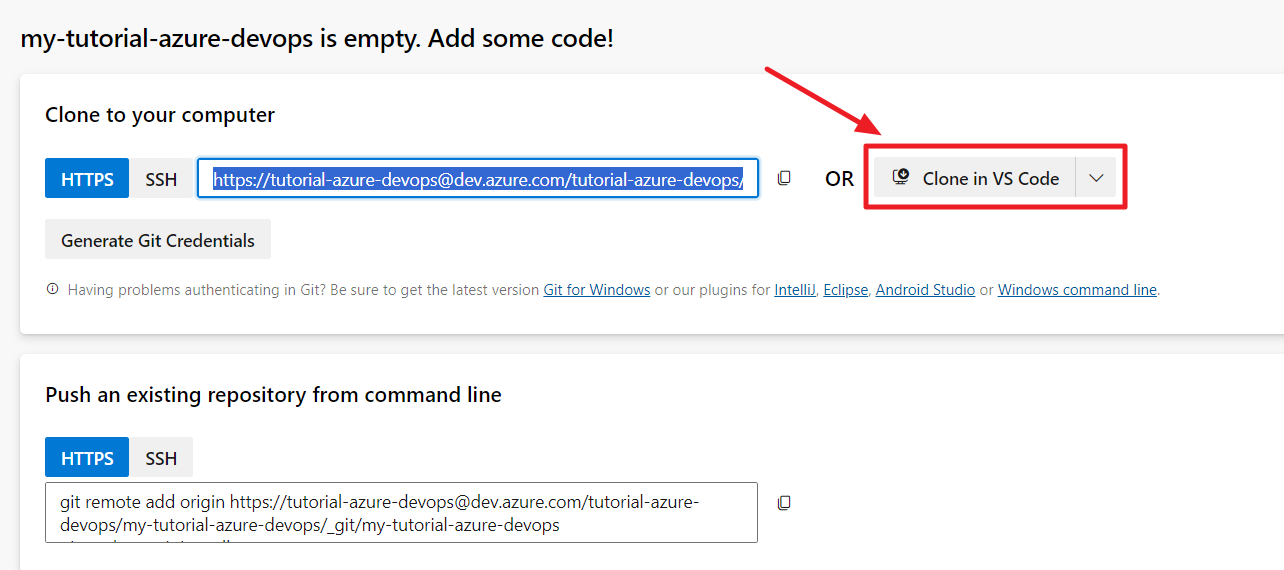
Use Visual Studio Code and Git on your personal computer and run the command to clone the repository and start coding:
| |
Or use the button on the DevOps screen:
From the Pipelines blade
You can configure the logic to generate the application from your repository’s code and deploy it (however, you’ll have to pay for Azure resources to automate deployment and host your application).
See this link below what a step-by-step example.
About Test Plans and Artifacts blades
I’ve not used them so far, it’s off-topic in this article for now.
Conclusion
There you have it! You’re ready to start building your awesome ideas and share them with the world.
Next, go read the article “**Deploy a REST API Python to Microsoft Azure**” that explains how to deploy a Flask application to Azure from a DevOps repository.
Follow me
Thanks for reading this article. Make sure to follow me on X, subscribe to my Substack publication and bookmark my blog to read more in the future.
Photo by Jakub Zerdzicki
