
The steps are simple and I have validated the process and the efficacy of the technique to creating a living soil.
Thanks to Charles Dowding for sharing his wisdom and knowledge! I wrote the following notes watching the video published on Charles Dowding’s channel. You can watch it using this YouTube link.
We will look in this article how Charles suggests how to start no dig in your garden.
Starting from weeds
You can use cardboard, then you apply a layer of compost, and you are done.
If you have no weeds, it will not be necessary to use cardboard. But who doesn’t have weeds? ;)
Then, you can plant straight away.
Yes, it is OK to plan in compost
How big should your new no dig bed(s) be
No matter the size, it will be the same area.
But maybe start a smaller area.
Preparing the area
Before you start with the bed, it is a good idea to cover the chosen area with black polythene cover (that you can reuse multiple times).
It will serve to weaken the weeds.
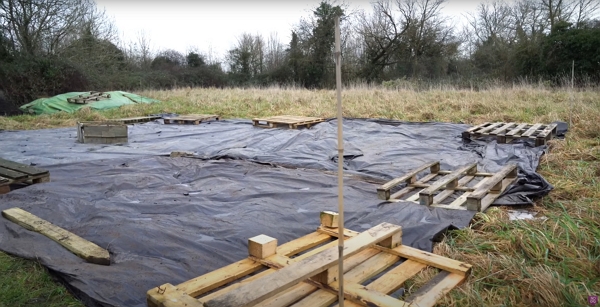
Do it a month before the actual bed making.
The key is to keep the light away from the weeds. It will kill the plant’s roots.
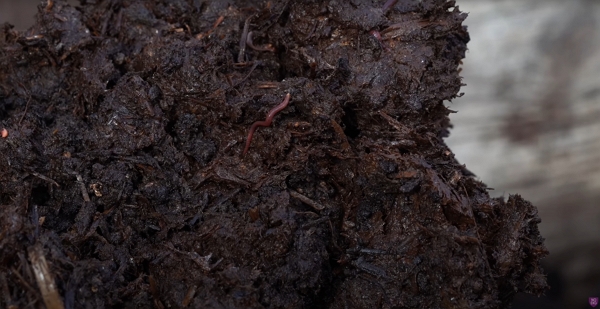
Also, it is a method that doesn’t disturb the soil. The structure of the soil is important to keep, because we don’t see all that is going on in it. It is a very complex system.
And the life will thrive in such a soil!
Notes about light and shade
Shade is OK, and leafy crops will do OK compared to crops really needing the sun light (tomatoes for example).
If you have leaf-dense trees, maybe pruning them to produce less shade is better than cutting the tree down.
Personal note
With a tree, you will have roots and depending on the crops, it can affect the growth.
But most importantly, the fungal activity that a tree brings is positive for the soil quality.
So think well before cutting a tree down
Soil on uneven ground
Before applying the compost, you can cover the portions of the select area that are uneven with soil.
Why soil rather than compost? It is because of the density of soil which will hold better on the long run. Meanwhile, the compost will shrink and the uneven ground will appear again.
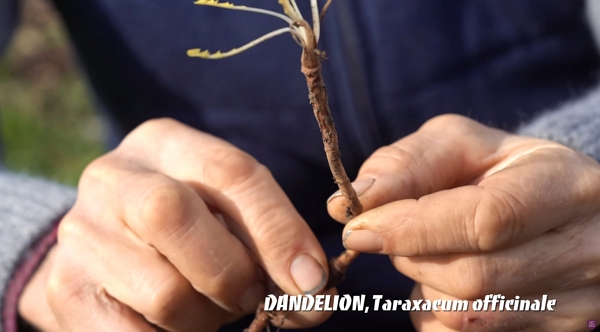
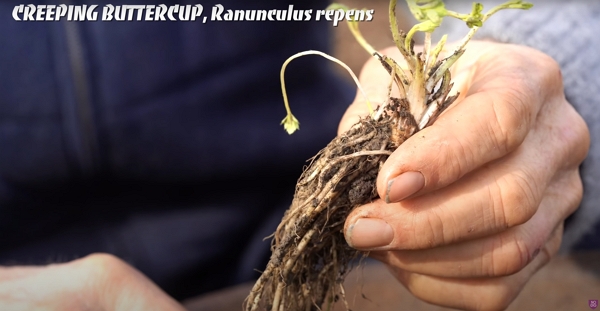
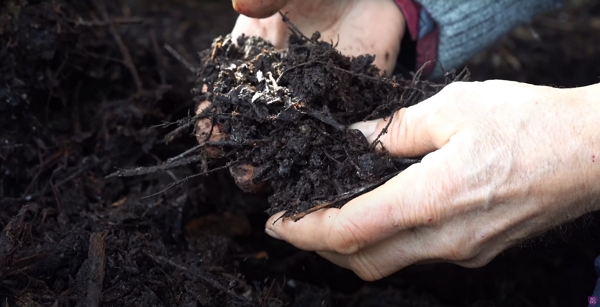
What about weed roots in the soil?
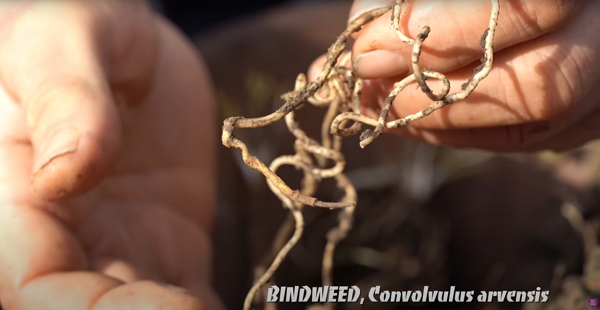 You can find weed roots like, bindweeds, dandelions, buttercup and more.
Bindweeds might not die in the soil, dandelions and creeping buttercup will.
So fish out the bindweed roots!
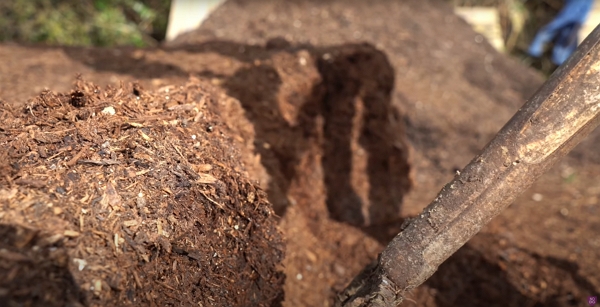
Differents compost
Homemade compost
Charles’s homemade compost is rough and not the perfect compost, but it is quite woody and that helps to keep a good fungal activity, good for plants.
The composition is green waste, cardboard, mowing waste and woodchips.
It is good for almost any crop.
Horse manure
If it contains worms, decomposition is still ongoing. And it is fine to use compost for horse manure in such a state for the no dig beds.
Cow manure
It can be dry after a while.
Woodchips
It will require a lot more time to decompose.
Charles’s warning
The best way to use the compost made from woodchips is to put it on top.
Why? Because large pieces of wood not yet decomposed can take the nitrogen out of the soil.
However, it is a fantastic mulch for pathways. Just put cardboard first. It will feed the soil and that is beneficial.
Green waste compost
It is not the perfect compost, but it can be easily found for little money.
It comes from the decomposition of the wastes at hot temperatures.
It is very dark and it is a good idea to let it sit a while to give it some activities (soil life) and remember, fish out the bindweed!
Commercial potting compost
It is not to use solely to cover the area chosen, but more for potting or applying a thin layer on top of another compost.
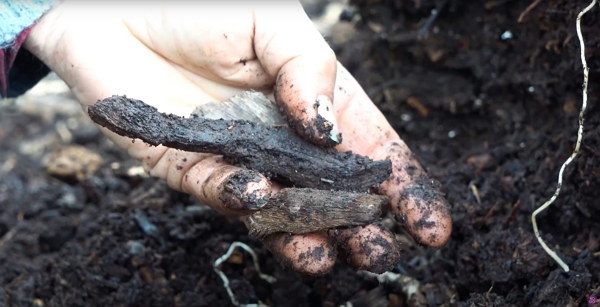
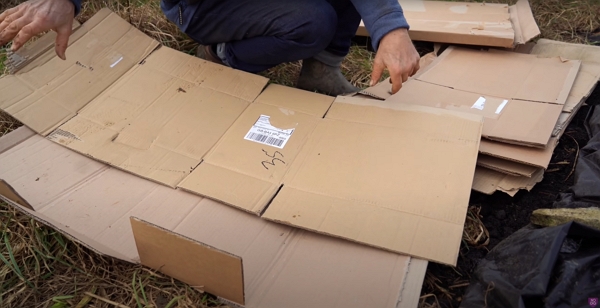
Information about cardboard
Choosing cardboard
- remove any tape
- don’t shiny cardboard
- use brown cardboard
If cardboard has printing on, it is usually fine if it is vegetable-based inks. It depends on the shop. The rule is: the less ink, the better.
Applying cardboard
Try to overlap the cardboard piece like shown below.
Otherwise, to have a clean edge, you can add cardboard under to keep the light from feeding the weeds.
Wood piece to mark the bed.
It is not required, but it can help to set wood pieces around the bed to hold or to form the bed.
Once the bed is settled, you can remove it.

Do you need to wet the cardboard
Yes, if you will apply the compost in a dry region, especially in summer time.
No, if you are getting a good amount of rain or rain often, like the UK for Charles.
Applying the compost
See the vlog at 17:35 for the demo.
Charles just pours the buckets of compost one at a time, breaking any bulk pieces.
Don’t puncture the cardboard!
At this stage, you don’t want to puncture the cardboard so the weeds can’t grow up.
You can plant anything now, because by the time the plant’s roots reach the cardboard, it will be soft enough to allow the plant to reach further down.
If you want to plant straight away, with a lot of weeds, apply about a 10 cm layer of compost.
To be continued about Charles’s No Dig method…
